

Mounting a balcony drying rack onto a railing requires more than just hanging a couple of hooks; it involves managing cantilevered forces, friction, and wind load to prevent damage and dangerous falls.
The Physics of Cantilevered Loads and Weight Distribution
When you hang wet laundry on a balcony rack, the structure acts as a lever arm. Wet textiles can weigh up to three times their dry weight due to water retention. This mass exerts a downward force that translates into torque at the mounting points on your railing. If the rack is poorly positioned, this rotational force (moment of force) can deform thin-walled metal railings or loosen the mounting brackets over time.
To counteract this, the load must be distributed as closely to the vertical support posts of the railing as possible. Avoid placing the rack in the exact center of a long, unsupported horizontal rail span, where deflection (bending) is highest. Opt for racks with adjustable lower support arms that press against the vertical balusters; this secondary contact point converts rotational torque into compressive force, stabilizing the entire assembly.
Preventing Galvanic Corrosion and Surface Wear
Direct metal-on-metal contact between the drying rack bracket and the balcony railing is a recipe for structural failure. When two dissimilar metals—such as a steel rack bracket and an aluminium railing—come into contact in the presence of moisture (rain or humidity), an electrochemical process known as galvanic corrosion occurs. This rapidly degrades the weaker metal, compromising safety.
Furthermore, physical vibration caused by wind or loading clothes will scratch protective powder coatings or paint, exposing the underlying metal to oxygen and moisture, leading to rust. Always insert a non-conductive, compressible barrier between the clamp and the railing. Heavy-duty EPDM rubber strips, silicone pads, or specialized polymer gaskets serve a dual purpose: they isolate the metals to prevent chemical corrosion and provide a high-friction grip that stops the rack from sliding horizontally along the rail.
Selecting and Adjusting the Clamp Mechanism
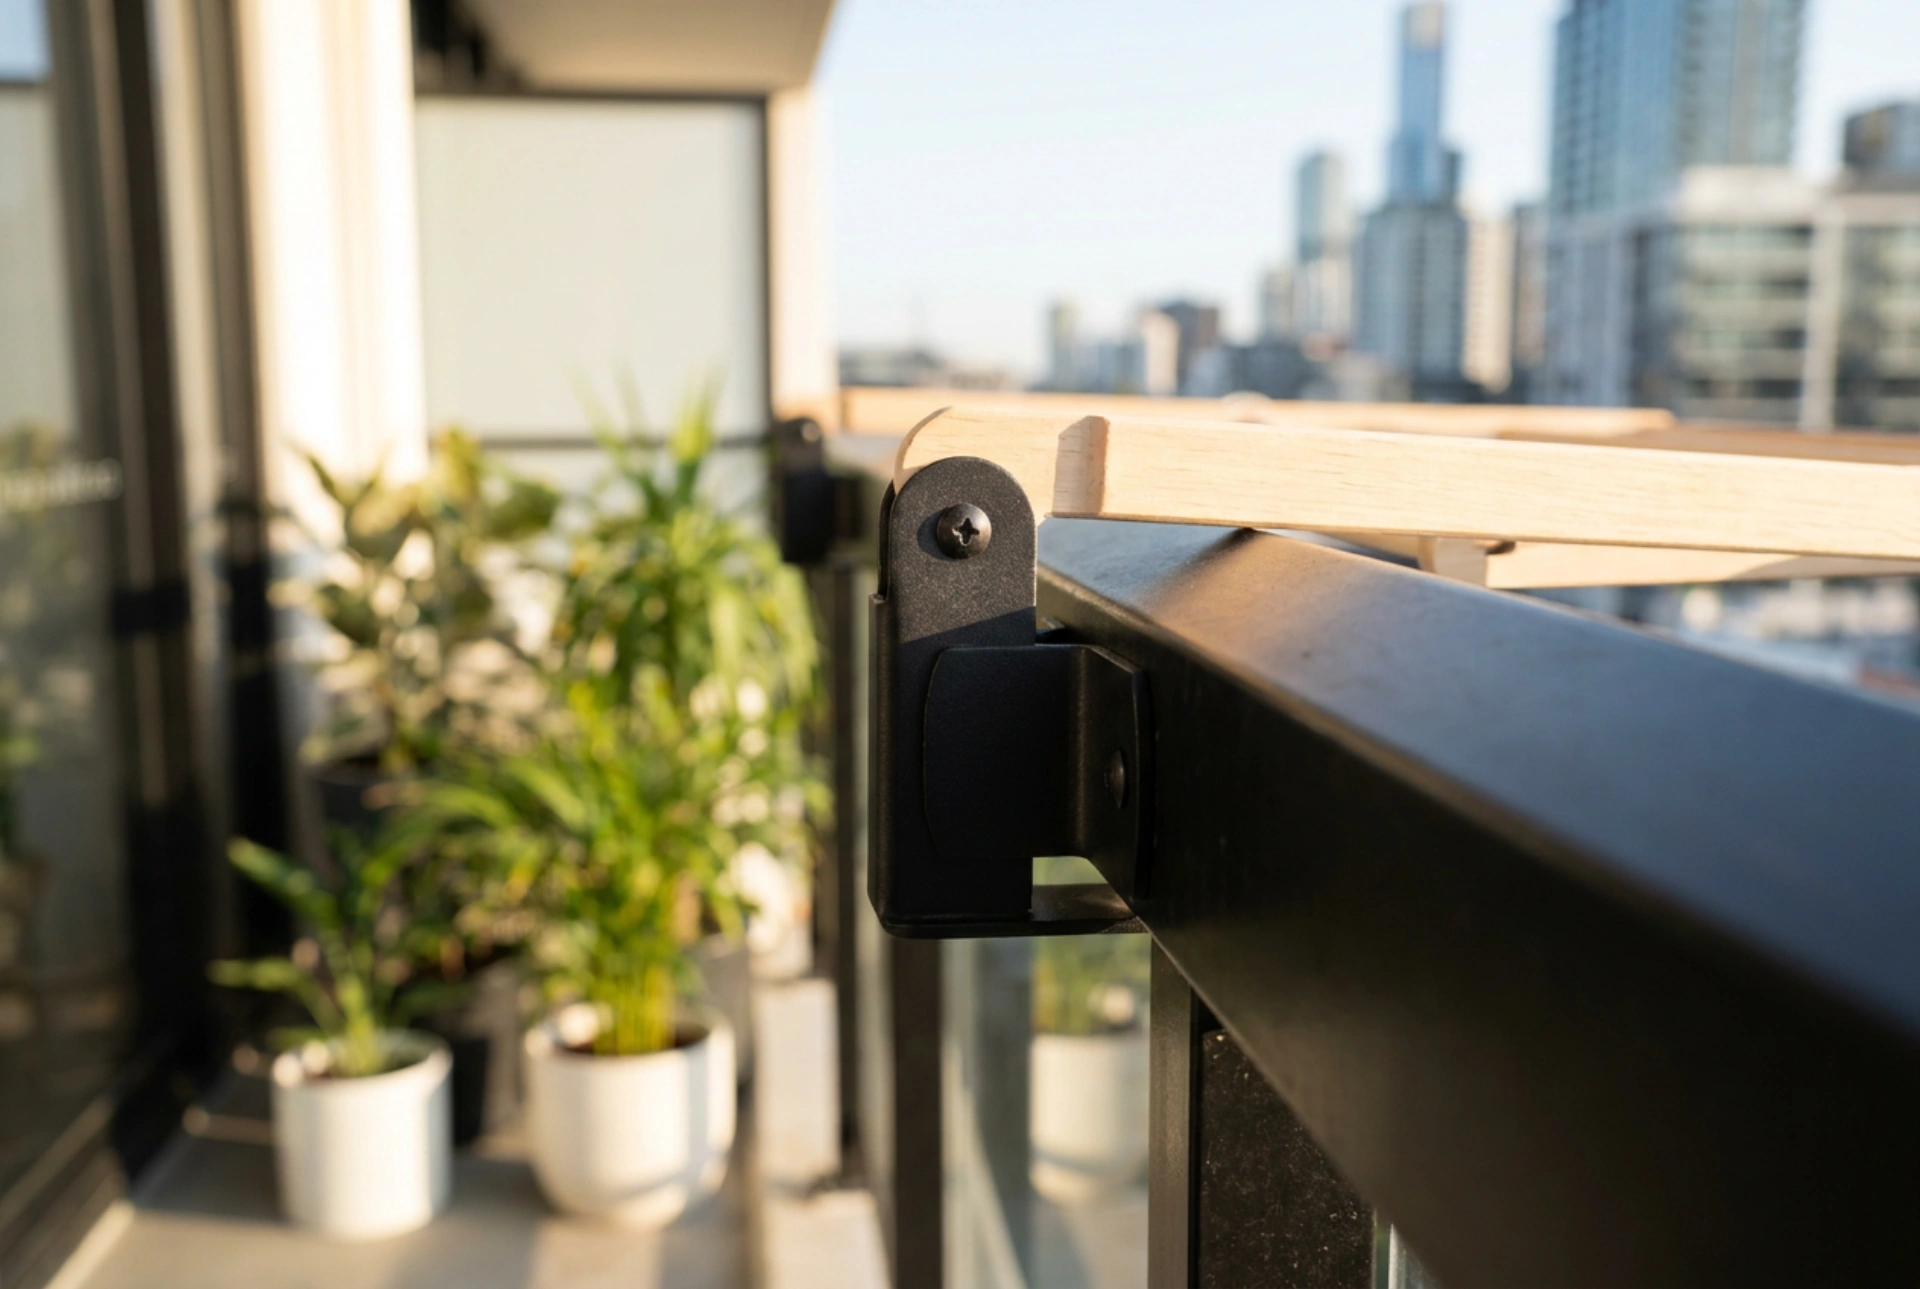
Secure mounting relies on positive-locking mechanisms rather than simple gravity hooks. Gravity hooks are susceptible to uplift forces caused by sudden gusts of wind, which can lift the rack clean off the railing. Instead, utilize adjustable tension clamps or U-bolts that wrap entirely around the profile of the handrail.
Step-by-Step Secure Installation Sequence:
- Measure the profile (diameter and shape) of your handrail to ensure the bracket matches its curvature or flat surface.
- Apply the protective rubber spacer around the handrail at the designated mounting spots.
- Position the bracket over the spacer, ensuring the vertical alignment is perfectly perpendicular to the ground to keep the load balanced.
- Tighten the clamping screws progressively. If using a dual-bracket system, alternate between the left and right sides, tightening each bolt a few turns at a time to distribute tension evenly.
- Apply medium torque; over-tightening can crush hollow metal balusters, while under-tightening allows dangerous slippage.
Mitigating Wind Uplift and Adding Safety Tethers
High-altitude balconies are subject to significant wind shear and aerodynamic lift, especially when the drying rack is fully loaded with clothes acting as a sail. To eliminate the risk of the rack being dislodged and falling, integrate a redundant safety tether system. Thread a high-tensile, UV-stabilized nylon cable tie or a plastic-coated steel safety lanyard through the main frame of the drying rack and loop it securely around a primary structural post of the balcony. This ensures that even if the primary mechanical clamps fail or loosen under vibration, the rack remains physically anchored to the building envelope.
Routine Inspection and Material Integrity
Outdoor environments expose mounting hardware to temperature extremes and UV radiation, which can degrade materials over time. Create a simple monthly maintenance checklist to ensure structural integrity: check for any looseness in the clamping bolts, inspect the polymer spacers for cracking or UV-brittleness, and look for signs of rust or powder-coat peeling at contact points. Tighten any loose fittings immediately and replace worn rubber pads to maintain a high-friction, secure hold throughout the seasons.